Tuesday, December 30, 2008

Petal Pizzazz Card


Here is the card I had tucked into my card organizer, that was posted on Sunday. It uses new Raspberry Tart Designer Series Paper and the new Petal Pizzazz stamp set. It is a very simple card. It could be used for many occassions such as a thank you, thinking of you and even a birthday.  Remember these new items will be available starting January 19th.

Monday, December 29, 2008

Parasol Candy Dish


In my Quest for new ideas, I stumbled on a candy dish made from a piece of paper. 


It looked like the paper was folded like that fortune teller game we made as kids, but turned upside down. 


What an AWESOME idea! 

I made mine from a 10" x 10" sheet of the new Raspberry Tart Designer Series Paper, to be available with the release of the new Idea Book & Catalog on January 19th. 

I used a new set Petal Pizzazz to stamp the top of my Parasol. I stamped the image 3 times to give the end a little bit of a different dimension.


Directions to fold paper into fortune teller came from http://www.yasutomo.com/project/fortuneteller.html

Sunday, December 28, 2008

Card Organizer


Yesterday I went to my friend Lorrie's house to try and get some stamping done. Last time I was over she showed me a card organizer that she had made. 


I said next time I would love to make one. 

Since I had brought the new Raspberry Tart Designer Series Paper and the new Petal Pizzazz stamp set, I decide I was ready to make my very own card organizer. 

Lorrie was so gracious to  show me how to use her RubiCoil machine. 

See Lorrie, I remembered what it was called. 


This organizer has pockets on each page to store the cards for that month.
 
Thanks again Lorrie.

I am so pleased with my card organizer. 

I even stuck my card I am posting later in the pocket. 

Monday, December 22, 2008

Glitter ornaments


Here's a fun project to do. You need to have a clear glass ornament ball, ink refill, fine glitter and some Rub-ons.
 
First you take the top off the ornament. 

Carefully drop ink into the ornament swirling it around so that all of the glass is coated. 

Make sure you use enough ink, this is what the glitter will be sticking to.

Then you pour in your glitter using a funnel or a paper funnel. 

Cover your opening with a napkin, shake the ornament until all areas are coated. 

Let it dry. 

Replace topper, and put on your Rub-ons. I added a bow for a finishing touch.

Sunday, December 21, 2008

Snowman punch card


Some of you may think this card looks familiar, I originally posted  a smaller version made to be a gift card(4-1/4" x 5") on November 7. I made this one to be a regular card(4-1/4" x 5-1/2"). 
Today it was published on Stampin' Up! Stampers Showcase.  Stampin' Up! Stampers Showcase is a feature/ database that all Stampin' Up! demonstrator have access to. It has many cards submitted from demonstrators from all over. From this many demonstrators get ideas or inspiration to create their cards.

Would you like to SIGN UP TO BE A DEMONSTRATOR?

Would you like to become a member of my team?

It is a great time to be a Stampin' Up! Demonstrator. Whether you are interested in discounts, growing as a stamper or building a business, Stampin' Up! is a great opportunity. 

You can sign up thru me or my website. To join thru my website go to www.ginascardsandmore.stampinup.net. Click on Join Now in the top right corner. The online password is 2jointhefamily. 

Still need more information, please contact me at ginadygert@yahoo.com or (757)483-6433 to learn more. 

Saturday, December 20, 2008

Initial Gift Tag

I wanted to make my own gift tags this year. I thought it would be cool to do initials, making it easier to pick out your present. 

Using the Serrif Essentials Alphabet I cut the first letter of each of my boys names mounted it on Natural Ivory and again on Riding Hood Red. Punched a hole in the corner and threaded some Silver Elastic cord threw the hole. Instant gift tag.

Friday, December 19, 2008

Jolliest Time of Year Candy holder


It is a great time of year. A time to let people know you appreciate them.
 
What better way than with chocolate. 
I made these candy holders to share with friends, teachers, bus drivers and more. 

To make this you need a 2-3/4" x 8-1/2" piece that you score at 3", 6", 6-1/2", 7-1/4", 7-3/4". 

Using the Word window punch on the section between 7-1/4" and 7-3/4" just a little more than once side by side. 

Glue section to make small box to place candy in. 

In the past I have used a glue dot to seal it shut, but this time I tied gold elastic cord thru the open box, so the flap would slide in behind the bow.

Wednesday, December 17, 2008

Holiday Line Up Milk Carton container


What an adorable design! I love the idea of making and decorating milk cartons and putting them in a container to give out as a gift. 

This pattern is adorable. I think the Holiday Line up is the perfect stamp set to make this with project. I used a Stamp-a-ma-jig and masking technique to line up the snowman so they would go the entire length of the container. Each of these milk cartons opens from the bottom so you dont have to ruin the carton to get the candy out. I wheeled each piece with the jumbo snow wheel. Then using the Scallop circle you can make a cute tag for each carton.

Tuesday, December 16, 2008

A very Merry Christmas card

This card is created using a wheel and ink pad. First I wheeled the snowflakes in Riding Hood Red and then I rubbed the corner of my Old Olive ink pad along the paper. It gives an interesting look. 

Monday, December 15, 2008

Snowman card


I absolutely love this set. Actually I love anything with a snowman, snowflake or butterfly. And this set has 2 of the 3. Here is one of the cards we made at a recent Stamp-A-Stack. 
I stamped this snowman twice cutting him out on one copy. Using Stampin' Dimensionals I am able to make him POP from the page.

Sunday, December 14, 2008

Penguin Twisting Box Head


Today my youngest son Jonathan wanted to make a paper craft. He definitely had his heart set on making a twisting box head, but had to decide what to design on it. He thought about a penguin, then a polar bear and even a cow, but decided he really wanted a cute penguin.
 His first search of a picture, he was able to really see the ideas. Our neighbor Kris suggested looking up Happy feet. We sponged the dark area and colored in the rest with markers. 
So this Penguin head is suppose to be Mumble from Happy Feet. 
What do you think?

Merry Christmas Card

I have seen may variation of this card over the last few months.  I believe Melissa is the first one to make it. 
It is truly a cute card that uses a simple technique. This is how I made my adorable card using the Winter Post Stamp set. 
This card is not complete without a little glitter. 

Friday, December 12, 2008

Snow Card

Here is a card that could be used for Christmas or a winter hello. The snowflake is embossed with silver embossing powder that goes nicely with with the brushed silver card stock and silver brads.  

Wednesday, December 10, 2008

Christmas Wreath


Today in my card class we made two beautiful Christmas Cards. In this card we used a stamp from the Snow Burst stamp set to make a wreath. To make the Holly berries I used a brand new pencil inking up the eraser to make the perfect sized berry. We finished off our wreath with a little two-way glue, some Dazzling Diamond Glitter and taffeta ribbon. This Card measures 5-1/4"x 5-1/4". I like to give envelopes at my classes so your cards are all ready to go out. Plus it gives us a little more to stamp on. Here is how I stamped my envelope. 
Remember No Naked Envelopes! 

Monday, December 8, 2008

Holiday Treasure Paper Ornament


I saw this adorable paper ornament that I just had to make. It is rather time consuming to make this beautiful ornament. You need 60 pieces of 3" x 3" paper. 
Each piece needs to be folded like in the below photo and glued into a petal. 


Glue 5 petals together to make a flower. 
Use 6 Flowers to make half of the ornament then attach the 2 halves together to make this ornament. 
Don't forget to attach a string in the middle of your two halves so you will have something to hang it by

Sunday, December 7, 2008

Let it Snow Banner Card

Recently I have seen several banner cards. I decided I just had to make one myself. I choose to use the words "Let it SNOW", since I just love snowman and snowflakes. 
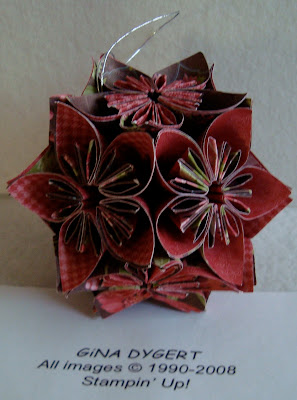
I used the Manchester Designer Series Paper along with the coordinating colors.  I was able to cut the base out of one sheet of card stock. I cut it length wise at 4-1/4". So I had one piece 4-1/4" x 10-1/2 and the other 4-1/4" x 11". I scored at 3-1/2", 7" and 10-1/2". The flap is where I glued the two pieces together. Then each base is covered with a piece of Designer Series Paper that is 3-1/4" x 4". Instead of using an "O" I decided I would use the snowman ornament from the card I made at my last technique class.For my embellishments I used Little Felt Flurries, Flower Fusion Too, buttons and Silver Brads. I added some snowflakes to the front of the card, so when it is closed up it has a completed look. I hope you enjoy this card as much as I do. 

Thursday, December 4, 2008

Happy Holidays card


Two Cool Dudes stamp set features this adorable snowman surrounded by the words let it snow. 
Don't forget to add the little details  like the fringe on the end of his scarf. 


To make the snowman on your envelope punch out a square on copy paper then place over envelope. Stamp over copy paper so that snowman's head is in square area.

Wednesday, December 3, 2008

Merry Christmas Card


  Have you started making your cards yet? Here is another idea for a Christmas card. 

Holiday Wishes

Done on a Kraft Base this card is a simple and clean look. Using Markers I could easily stamped the words in two colors. Don't forget to stamp your envelope. (No Naked Envelopes)

Monday, December 1, 2008

Winter Buddies


Winter Buddies made from punches. Each 
Little guy holds a candy nugget. You start out with a base of 1-1/2" x 5", scoring at 2" and 3" and round the corners.

 
The Scarves for the Polar Bears are made from 3 separate strips of paper. The first is folded to fit under the circle of the head and the other two are for the flappy ends.