Showing posts with label winter. Show all posts

Tuesday, January 6, 2009

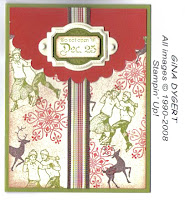
Season of Friendship winter card


This stamp set is very versatile and can be used for the different seasons. 


It is Season of Friendship and is featured in the Holiday Mini Catalog. 
So you know what that means....all items in the Holiday Mini Catalog will not be available after January 18th. 
 You can order on-line at my website  www.ginascardsandmore.stampinup.net click on shop now. It will be shipped directly to your house.

Sunday, December 21, 2008

Snowman punch card


Some of you may think this card looks familiar, I originally posted  a smaller version made to be a gift card(4-1/4" x 5") on November 7. I made this one to be a regular card(4-1/4" x 5-1/2"). 
Today it was published on Stampin' Up! Stampers Showcase.  Stampin' Up! Stampers Showcase is a feature/ database that all Stampin' Up! demonstrator have access to. It has many cards submitted from demonstrators from all over. From this many demonstrators get ideas or inspiration to create their cards.

Would you like to SIGN UP TO BE A DEMONSTRATOR?

Would you like to become a member of my team?

It is a great time to be a Stampin' Up! Demonstrator. Whether you are interested in discounts, growing as a stamper or building a business, Stampin' Up! is a great opportunity. 

You can sign up thru me or my website. To join thru my website go to www.ginascardsandmore.stampinup.net. Click on Join Now in the top right corner. The online password is 2jointhefamily. 

Still need more information, please contact me at ginadygert@yahoo.com or (757)483-6433 to learn more. 

Sunday, December 14, 2008

Merry Christmas Card

I have seen may variation of this card over the last few months.  I believe Melissa is the first one to make it. 
It is truly a cute card that uses a simple technique. This is how I made my adorable card using the Winter Post Stamp set. 
This card is not complete without a little glitter. 

Friday, December 12, 2008

Snow Card

Here is a card that could be used for Christmas or a winter hello. The snowflake is embossed with silver embossing powder that goes nicely with with the brushed silver card stock and silver brads.  

Sunday, December 7, 2008

Let it Snow Banner Card

Recently I have seen several banner cards. I decided I just had to make one myself. I choose to use the words "Let it SNOW", since I just love snowman and snowflakes. I used the Manchester Designer Series Paper along with the coordinating colors.  I was able to cut the base out of one sheet of card stock. I cut it length wise at 4-1/4". So I had one piece 4-1/4" x 10-1/2 and the other 4-1/4" x 11". I scored at 3-1/2", 7" and 10-1/2". The flap is where I glued the two pieces together. Then each base is covered with a piece of Designer Series Paper that is 3-1/4" x 4". Instead of using an "O" I decided I would use the snowman ornament from the card I made at my last technique class.For my embellishments I used Little Felt Flurries, Flower Fusion Too, buttons and Silver Brads. I added some snowflakes to the front of the card, so when it is closed up it has a completed look. I hope you enjoy this card as much as I do. 

Thursday, December 4, 2008

Happy Holidays card


Two Cool Dudes stamp set features this adorable snowman surrounded by the words let it snow. 
Don't forget to add the little details  like the fringe on the end of his scarf. 


To make the snowman on your envelope punch out a square on copy paper then place over envelope. Stamp over copy paper so that snowman's head is in square area.

Friday, November 28, 2008

Felt Flurries Door Draft stopper


Today I made this cute Door Draft stopper. 
You will need a piece of material 8" x 44". Using a package of the Little Felt Flurries, I glued (tacky glue) on the Riding Hood Red snowflakes to my material. I then stamped the snowflake from Punch Pal Stamp set and punched it out using the 1/2" circle punch. Placed it 
in a build a brad then applied  it thru the larger of the 3 snowflakes and cloth material. Folding the right side in length wise, I then sewed the length of the material leaving 1/2" sewing allowance.  Turning it right side out. Then stuffed batting and dried lentils. I then tied the ends off with Riding Hood Red 1-1/4" Striped Grosgrain Ribbon.

Wednesday, November 26, 2008

Snowflake Bucket


If you don't all ready own the Sizzix snowflake, here is another reason to get it. As you can see each of these snowflakes come from the same snowflake. I just cut some portions off. For some of the snowflakes I cut pieces and reattached them off the edge just a little bit.

I purchased this Red Bucket at Walmart, in the seasonal area.

Wednesday, November 12, 2008

Regional make and takes.


Here are a few of my completed make and takes from the Va Beach Regionals. Each project uses cute embellishments. This 8-1/2" scrapbook page uses the snowflake from the Best Wishes & more stamp set. 

The tree comes from the Scandinavian Season set from the Holiday mini. I wasn't sure if I like this set at first, but after water coloring it, I realize how beautiful this image can be.

Wednesday, November 5, 2008

Snowman gift card


   I made this snowman gift card holder for a swap today. I am posting a cheat sheet, so you can make him too. His arms came from the Sizzix snowflake. His bodyis made from a 1-3/4", 2-1/2" and 3" circles. The rest of the shapes come from our line of punches. Don't forget to sponge around the white circles before putting him together. 

Sunday, November 2, 2008

Winter Post


Last night we recreated this adorable card. It was definitely a group effect. Thank you Faith, Luann, Lorrie and Norma for your help and the needed supplies I did not have. I am think about framing this one. This is definitely a WOW card!

Tuesday, October 28, 2008

Winter Post cards


Today my friend Lenore came over and we made these cards. We saw samples of these cards and just had to make them. The Winter Post stamp set makes for an awesome card. I can't wait to make the tag pictured in the Holiday Mini Catalog. 

Monday, October 27, 2008

Two Cool Dudes

This was the card I created for Stamp Camp this past weekend. I love snowman so it i no surprise that I choose to use Two Cool Dudes for my project. I would have to say Pacific Point is my favorite In Color. I find it to be a rich and vibrant color. 

Saturday, October 25, 2008

Door prizes

Today is our 2008 Holiday Stamp Camp. Here are the door prizes that I made. 
I took an inexpensive frame purchase at Ikea. I removed the thin plexi-glass and attached some window screen. Took one of those paper coasters  stamped on an image, sponged the edges and punched holes in each corner. Then I attached it with black wiring to the window screen. Cute and simple.  

The next one  is a cute box of coasters. The box is made out of one
 sheet of paper cut, scored and wheeled. There are a dozen paper coasters that I stamped with Basic Black ink for snow man and Baja Breeze and Pacific point for the snow man. I also colored in the little features on the snowmen. 
I realize that the colors may bleed when these coasters are used but they are meant to be disposable. 

Wednesday, October 1, 2008

Snow Swirled


Today there was a slight chill in the air. It made me think that not much longer and winter will be here. Maybe this year we will get some real snow. For now I will be happy with the snowflakes on this card. The white flakes are embossed.  

Tuesday, September 30, 2008

Welcome Christmas into your Heart


I absolutely love those words: Welcome Christmas into your Heart. They are part of the Heard from the Heart stamp set. This snowman is from Two Cool Dudes. The snow on the Baja Breeze is Jolly Wheel that gives a whimsical snow feel. I saw this "brads as buttons idea" on someone card from the Founders Circle swap and thought it would be cute. DON'T FORGET to wipe the ink off the buttons on the stamp.

Tuesday, September 23, 2008

Technique: Block Lettering

Last night at my Up-Lines meeting I was one of the Round Robin presenters. 

These are the two cards I showed. 


I spoke of how I use smaller pieces of paper when cutting out letters on the Sizzix alphabets.
 This gave me this wonderful idea of Block Lettering. Something simple yet very clean lined look. 

Saturday, September 20, 2008

SCRAPBOOK PAGE: Let it Snow


I just mounted my Two Cool Dudes stampset and just had to use it. 

So I created this scrapbook page using 3 of the 4 stamps. I also used the Big Shot with the GoGo Boots Die Cut alphabet.